0. Check to see if Python is installed on your machine
#
last modified October 6, 2025
~6 minute read
It is not uncommon for computers to come with Python installed. It is important to check this first, because having multiple versions installed can lead to some frustrations.
Perhaps the simplest way to check if you have Python installed is to open up a command line window (Windows) or a Terminal window (Mac).
On Windows, search for the program “command prompt”, which opens up a window that looks like this:
On a Mac, search for a program called “terminal”, which will open a window that looks like this:
In either of these applications, you can try to run Python. I want you to try three ways (if any of them work, you have python).
First, just enter python and pressing return. If you have python installed you will be greeted with something like the following:
The important part here is that there is a line that says something like “Python x.x.x” (in this case, it was Python 3.13.0). If you see this, you have python installed. You can move onto Section 2.
If this doesn’t work, then try entering python3, which should produce the same result. If this works, you have Python installed, and you can move onto Section 2.
If that still doesn’t work, try using py. If that works, you have Python installed, and you can move onto Section 2.
If you do have Python installed, then the prompt you are greeted with (>>>) is the Python prompt. That is, you are within a Python session. You can exit this session by typing exit() and pressing enter. This will bring you back to the main command prompt.
Also, if you do have python installed, then I am going to assume that you used the regular Python from the Python homepage. If that is the case, skip to section 2. If you obtained Python another way, then you cannot do what follows, and you should come chat with me, so that we understand exactly what you have installed.
If none of the three approaches above produce an image like that above, then you don’t have Python installed, and you can move onto the next section (Section 1).
If you did not have Python installed, we can install itby going to the Python homepage and then navigating to “downloads.” There, you will find a yellow button that has the most recent version of Python that is stable. At the time of this writing, this was Python 3.13.7.
Clicking this button will download an installer, which you can run to get Python installed. Once this is installed, you need to open up a new terminal window and try the Python command again. Now you should get a response that shows it is installed. You can move on to the next step.
The version of Python you downloaded does not have all the functionality we need. We need to add (at least) Marimo, Plotly, kaleido, Numpy, and Pandas to your Python environment. This is known as “package management” and is not that dissimilar to what you were doing if you were using Molab online.
There are many different ways to manage packages, but Python comes with one installed, called “pip”. To install Marimo, you can open up a terminal window and enter
pip install marimo
If you get an error you might need to use “pip3” instead of just pip, but try pip first. If neither works, then you will need to come see me during class, and we can work on it together.
Once Marimo is installed, you can repeat this for the other packages, but you can also install them all at once.
pip install plotly, kaleido, numpy, pandas
So you can see that you can simply list the packages that you want, separated by commas.
One thing you might be wondering is about package version numbers. When we were using Molab, we needed to use plotly==6.0.0 and kaleido==0.2.1. However, when using your locally installed version you do not need to do this! As long as you have the chrome internet browser (or other chromium-based browsers, like Microsoft Edge) installed on your computer, this will work.
2.1 (only if you don’t have Chrome-based browser installed)
#
If you do not have chrome, you can either download chrome, or you can do one more pip installation. You do not need to do this , if you have the chrome browser (or Microsoft Edge) installed. But if you don’t, run this.
plotly_get_chrome
At this point, you should have a fully functional local version of Marimo, and we can use it to generate all the figures for this class. However, it is worth ensuring you know how to use it, and testing the functionality.
To use Marimo, you again will use the command line (either in a command prompt window or a terminal window, as discussed in Section 0). The command to start editing in Marimo is:
marimo edit
This will open up a home that looks like what you say in Molab. There is a button to “create new notebook” and if you click on this, you will get a notebook, similar to what you had in Molab.
This can take just a moment to load. For me, less than 30 seconds.
Now, if you don’t tell Marimo otherwise, it will be running and creating files in the default directory for your command prompt/terminal session. If you don’t want this, you can first change the directory you are in, before running the Marimo edit command. This is not required, but you might find it more convenient for working with files.
If you don’t understand file structure, you can read this introduction. But if you are fine with it running where it defaulted to, you can just move on.
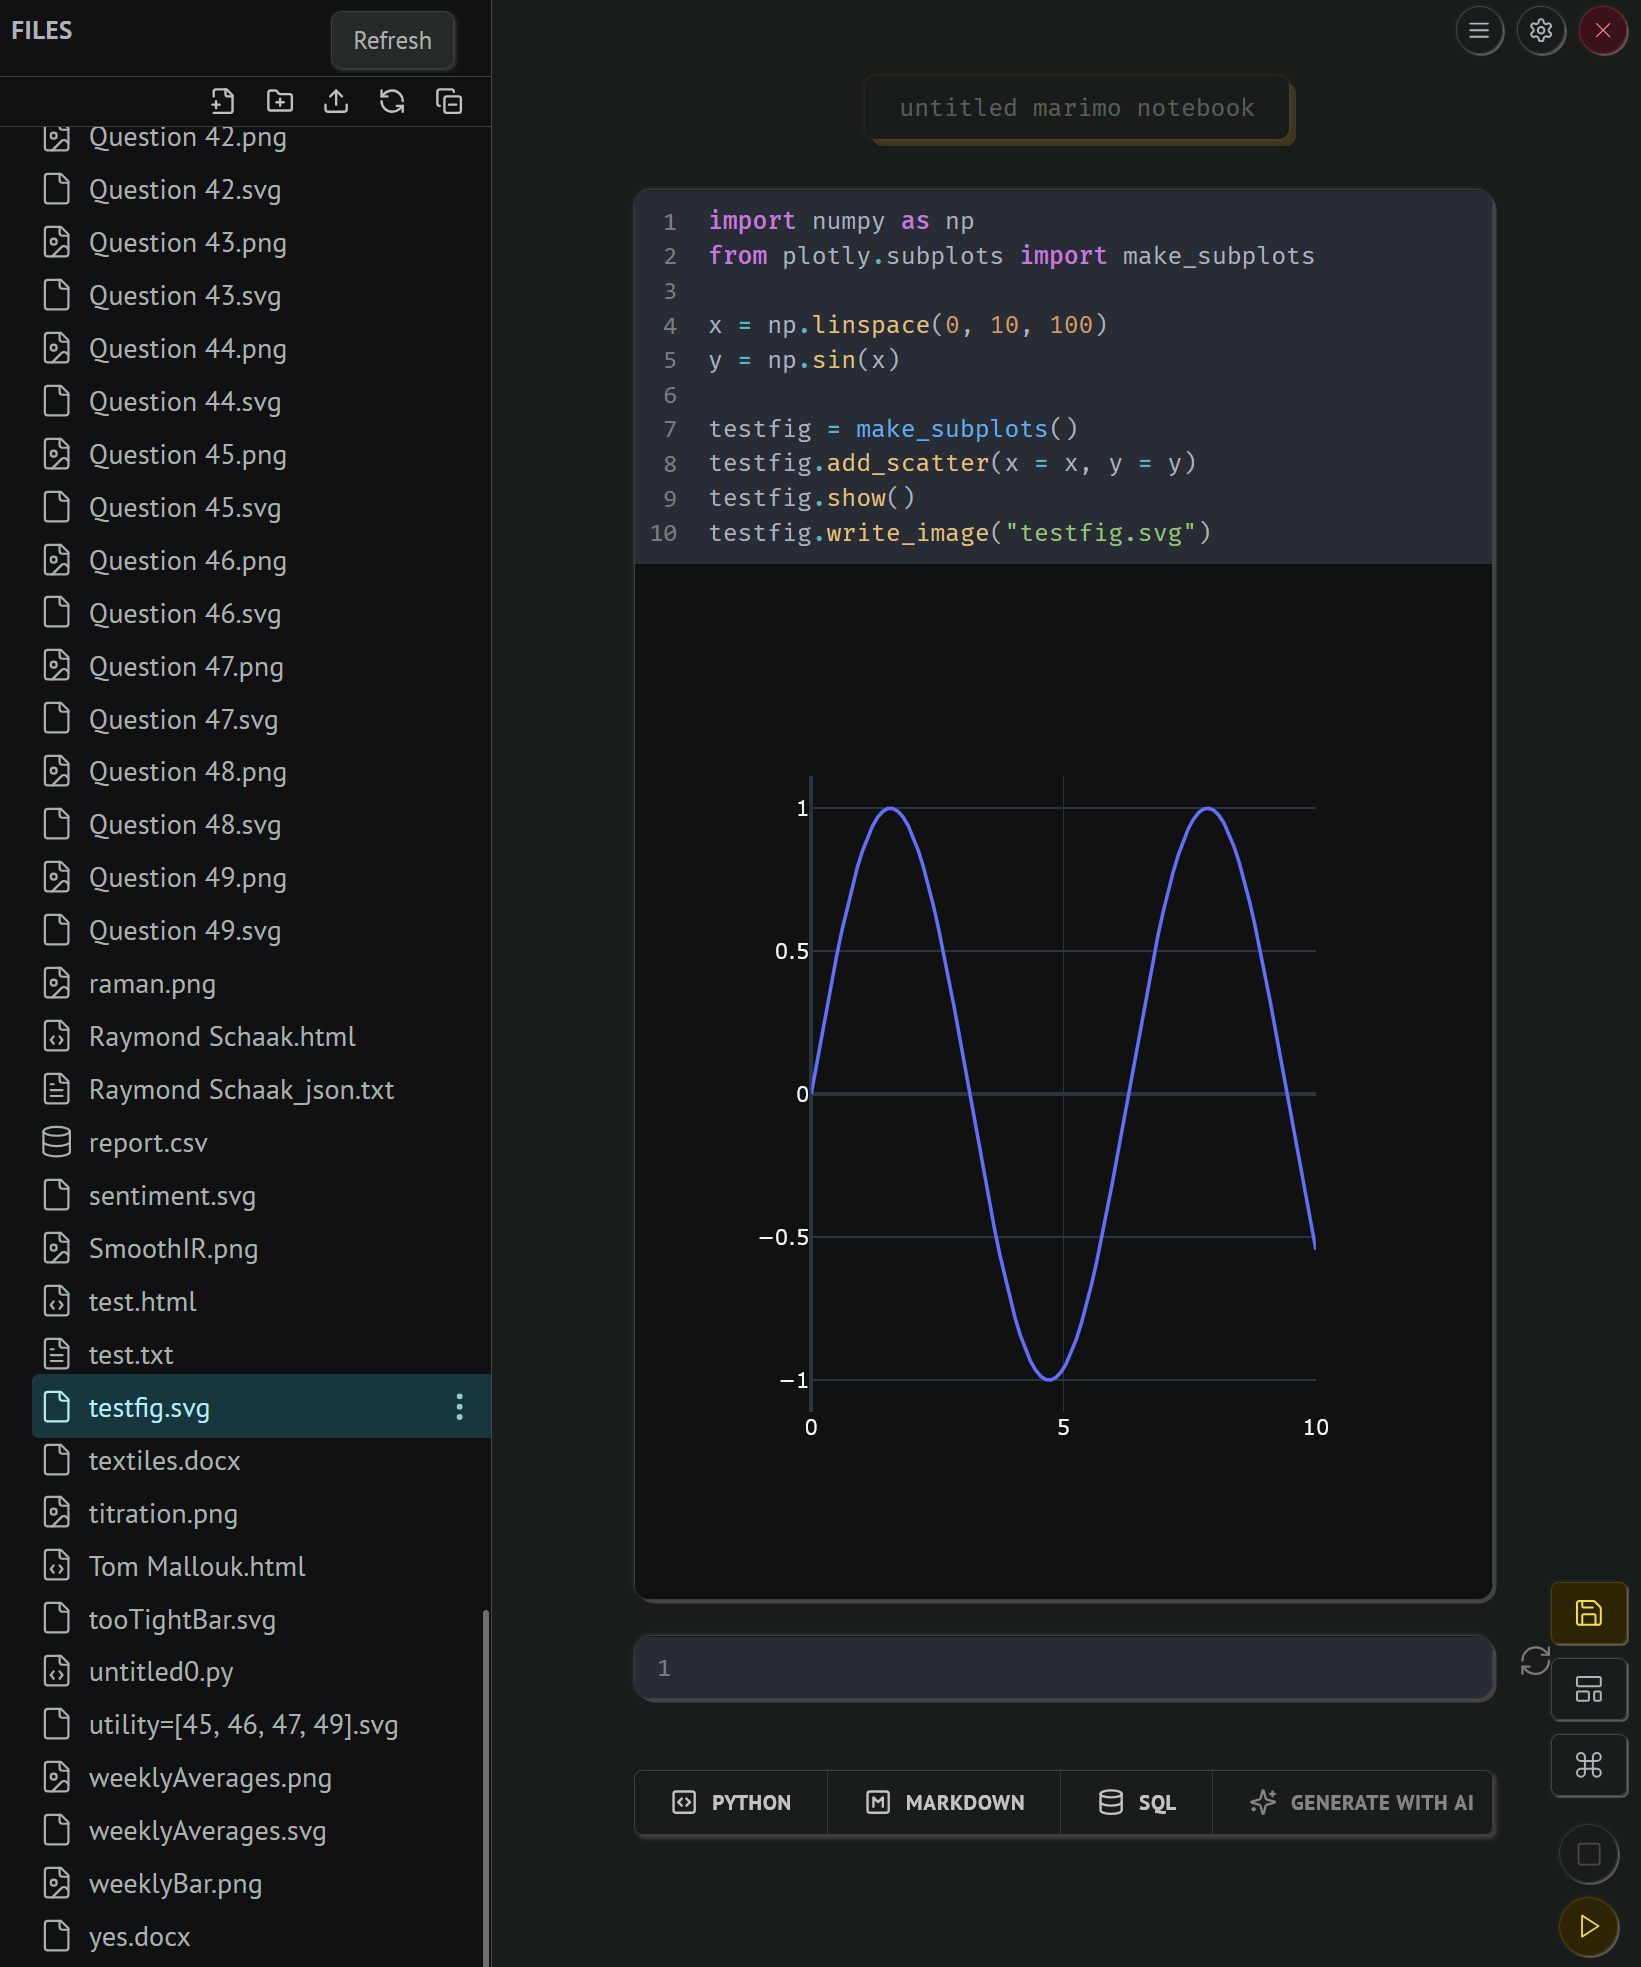
Once you have a Marimo notebook open, we can check that it can write static images, like svg files. You can copy and paste the following code in, and run it to check.
import numpy as np
from plotly.subplots import make_subplots

x = np.linspace(0, 10, 100)
y = np.sin(x)

testfig = make_subplots()
testfig.add_scatter(x = x, y = y)
testfig.show()
testfig.write_image("testfig.svg")
If this runs successfully, you will display a sine wave in the notebook, and you should have written the svg of the test figure to the same directory that the notebook is running in. You can check this in your computers file explorer, or the file explorer in Marimo (remember, you sometimes have to refresh the file explorer to see new files).
If you see this, then you are good to go! You have a fully functioning version of Marimo locally, and you no longer have to deal with the online Molab!